To order this product you must be logged into your distributor account. Not yet a M+A distributor, but interested in becoming one? Fill out this form.
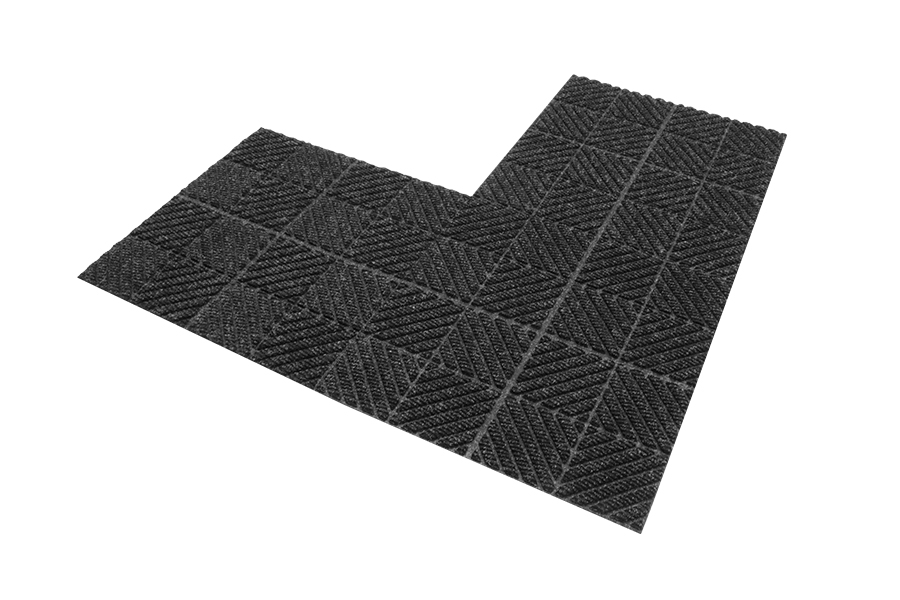
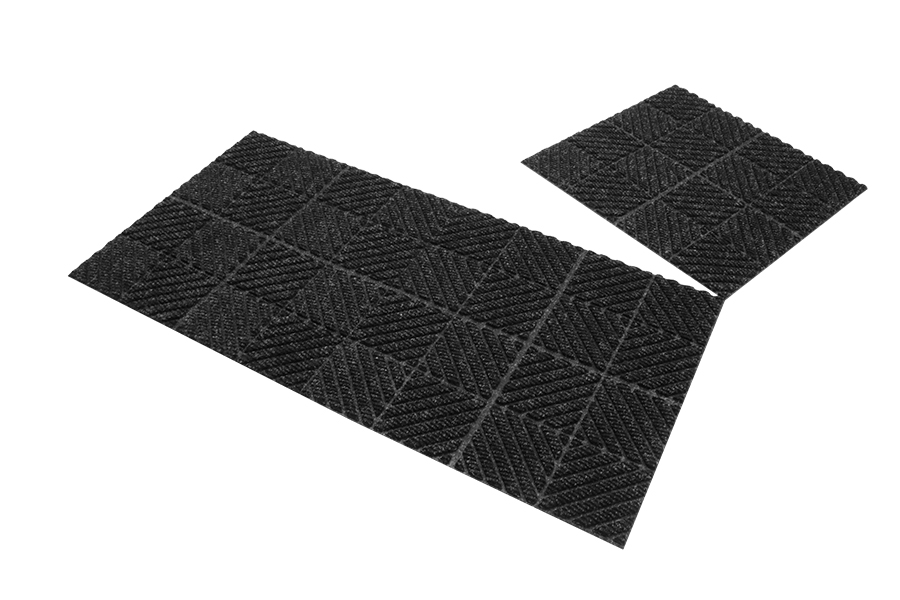
WaterHog® Max Tiles
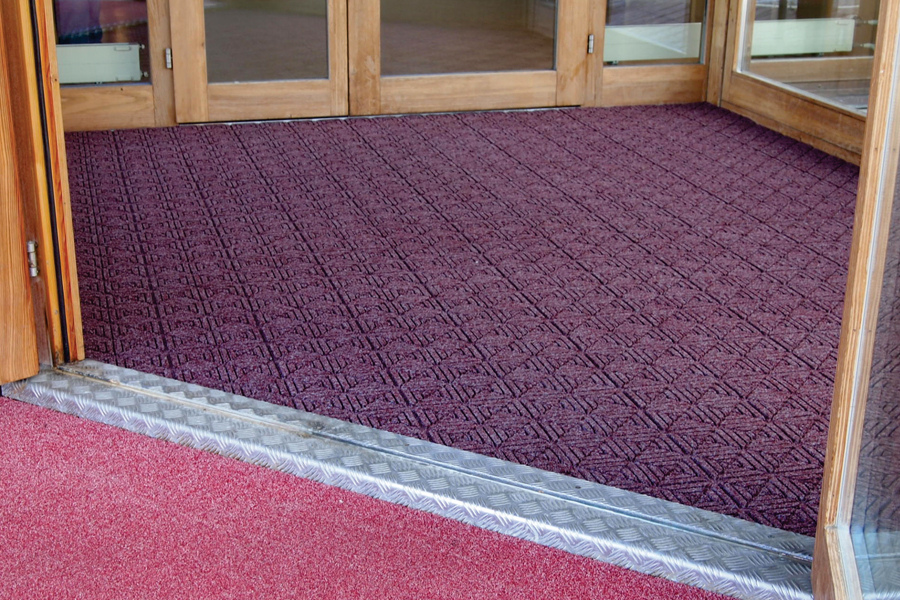
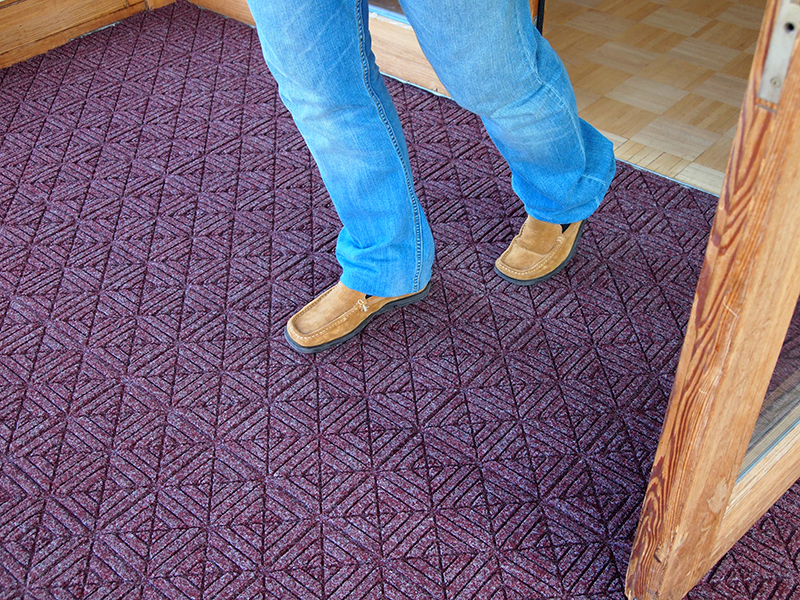
- Clean & Dry - Bi-level surface effectively scrapes dirt and moisture from shoes, trapping it beneath shoe level to prevent tracking
- Durable - Reinforced rubber nubs prevent pile from crushing and extend the performance life of the tiles
- Fade & Stain Resistant - Solution-dyed PET fabric (30 ounces/yard2) is resistant to staining, dries quickly, and will not fade or rot
- Safe -Certified high-traction by the National Floor Safety Institute (NFSI)
- Eco-Friendly - PET fabric is made from at least 90% recycled content reclaimed from plastic, and SBR rubber backing contains 20% recycled rubber from car tires
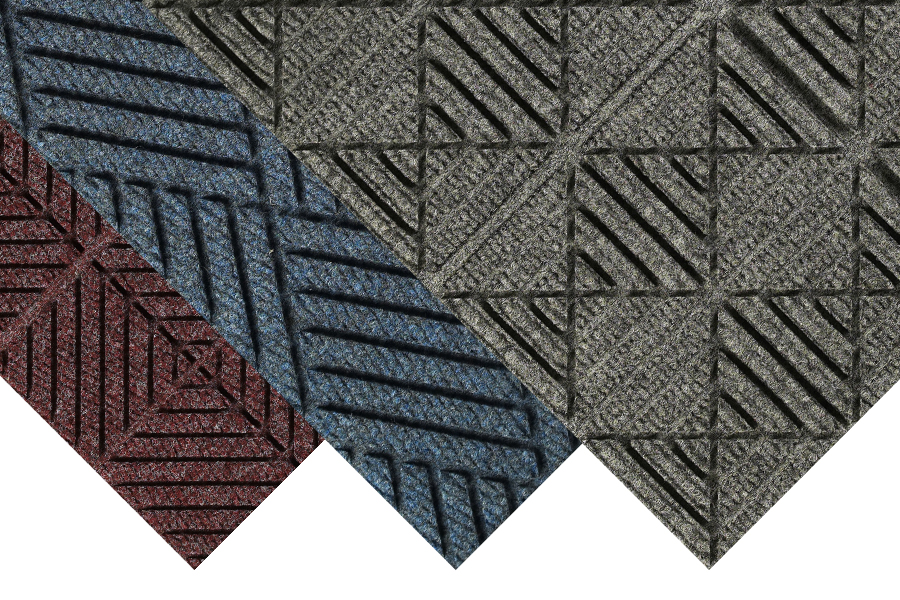
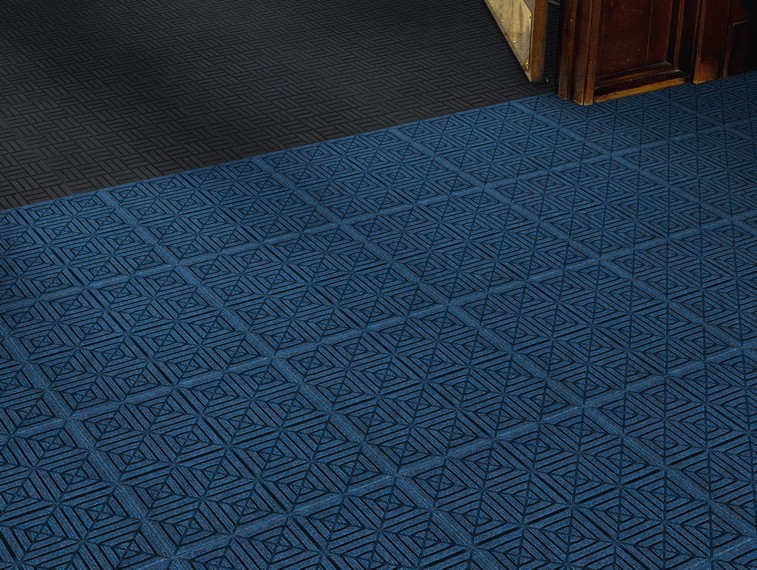
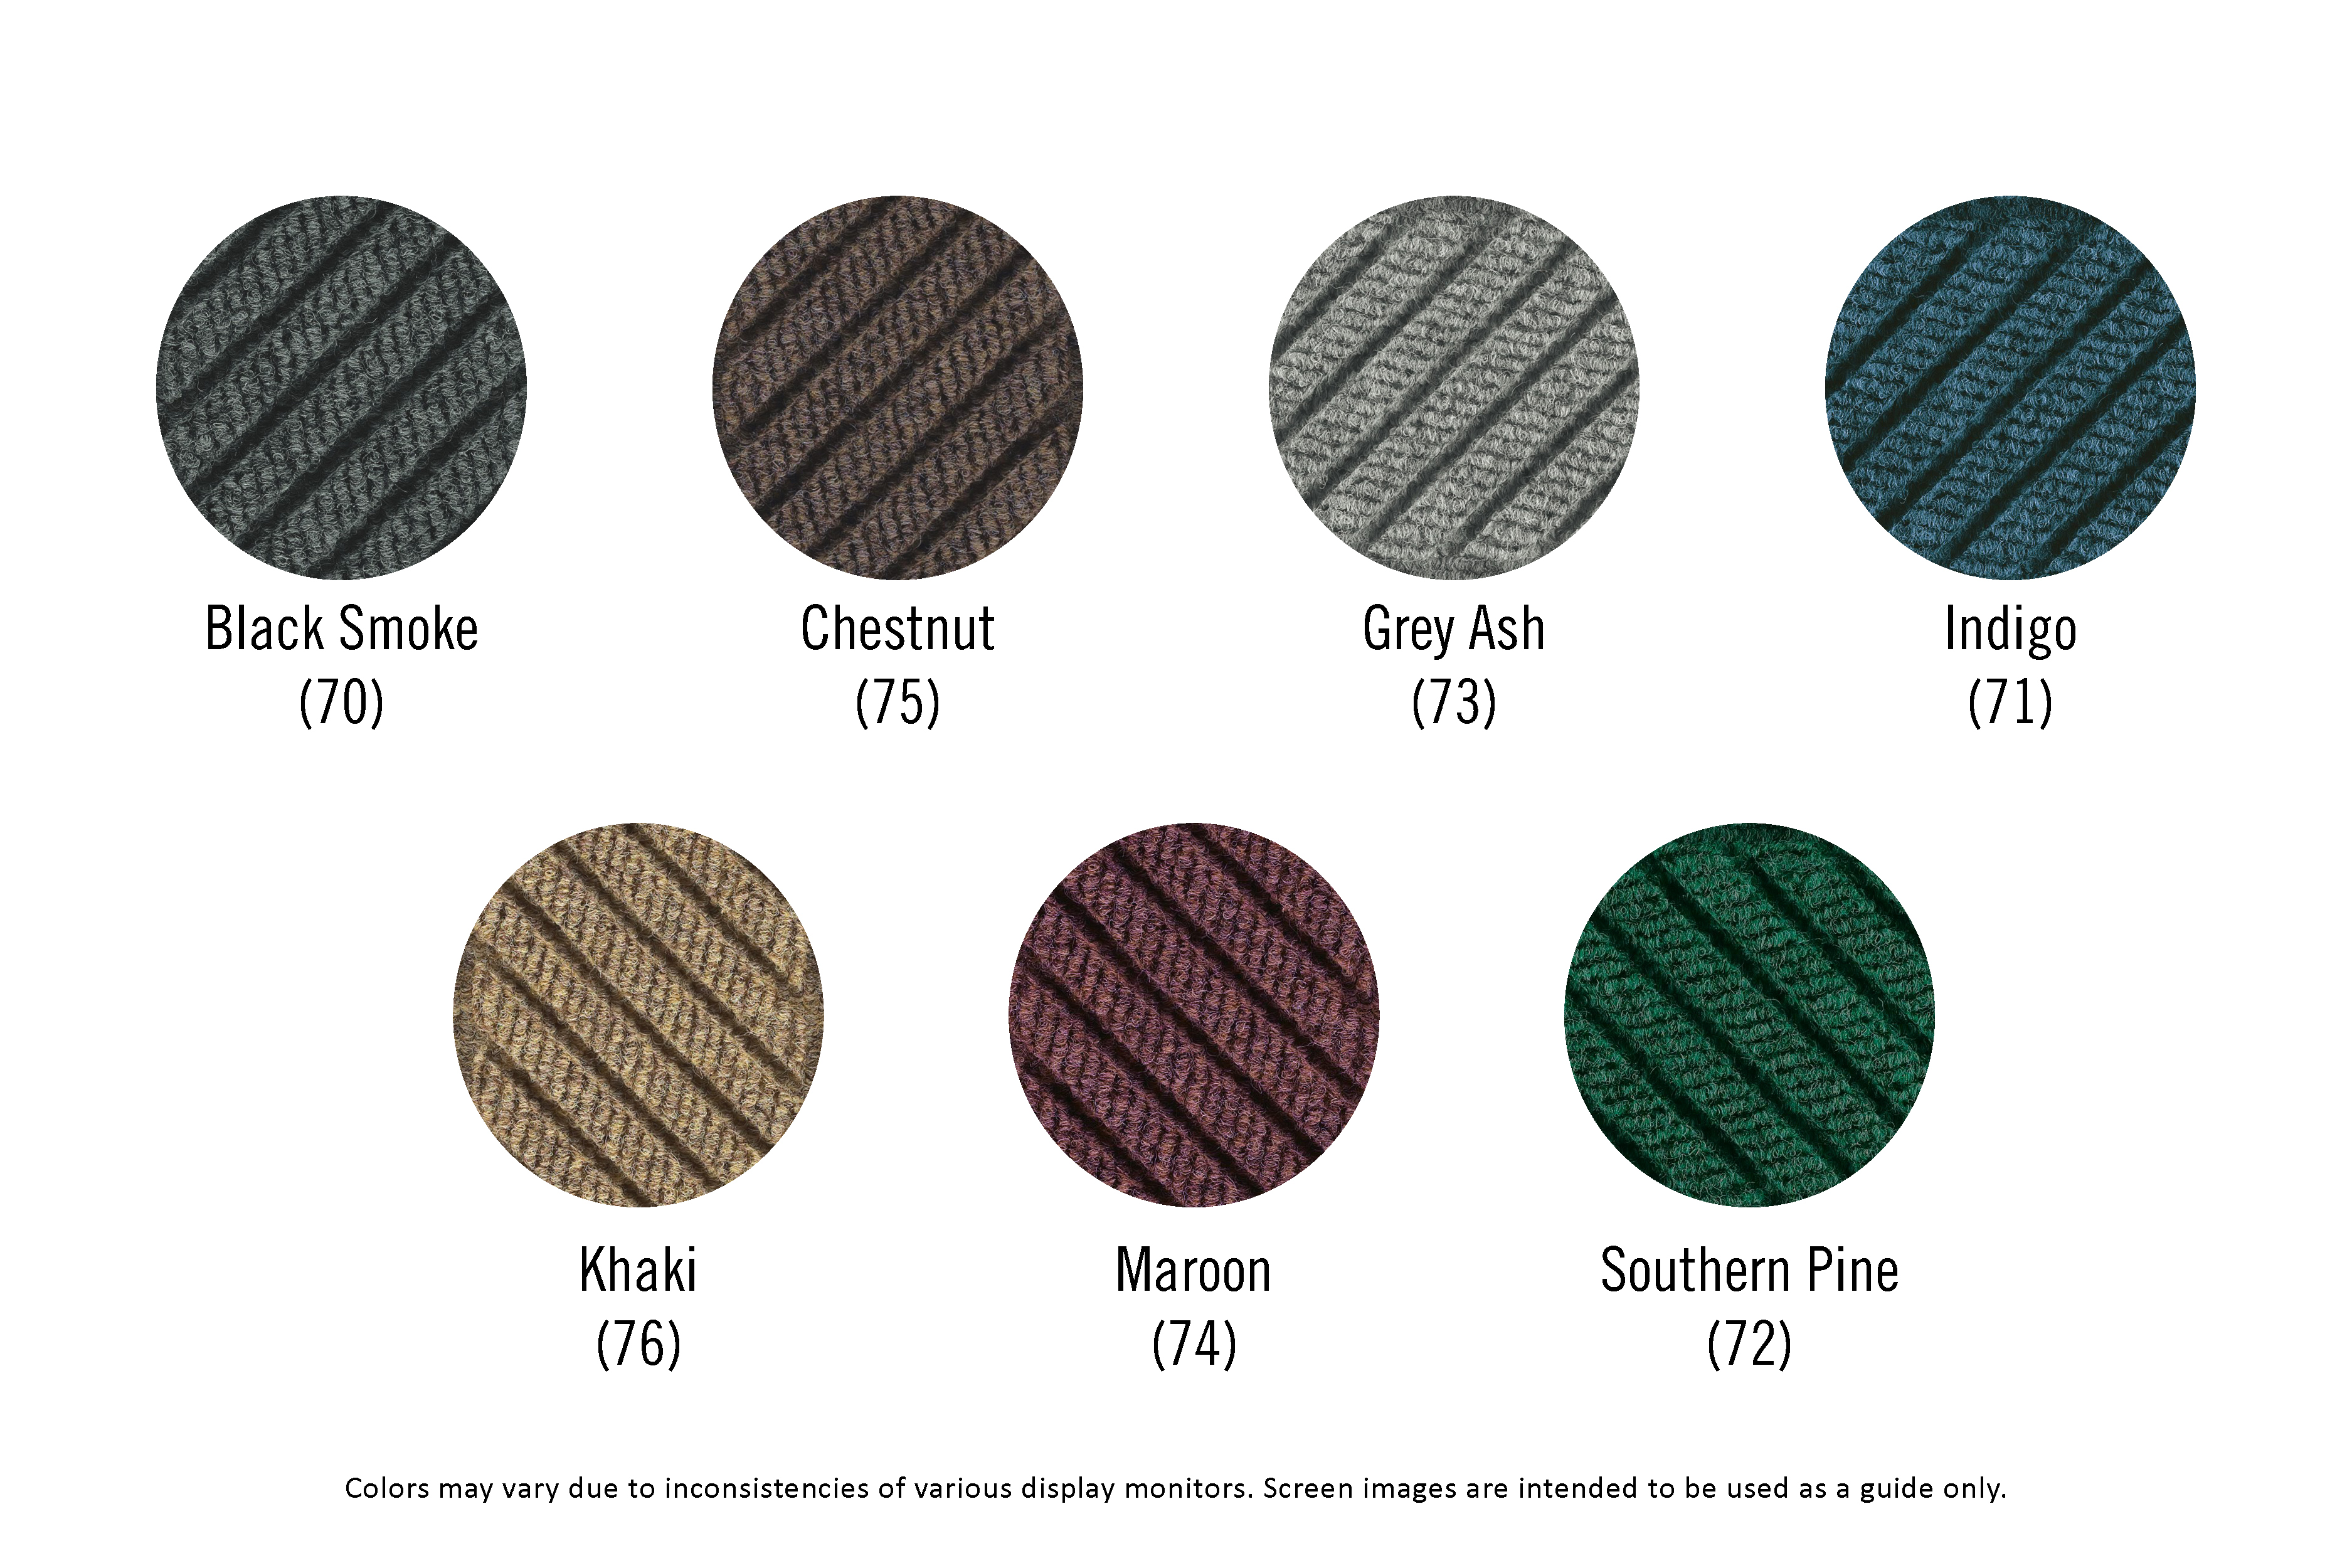
- Available in 7 colors with choice of 3 patterns: diamond, diagonal, or geometric
- Ideal for surface or recessed installations; feature a 100-mil (1/4") SBR cleated rubber backing. Rubber spacers (sold separately) are available if needed.
- Tiles can be installed inside or outside; solvent-free adhesive is required for installation (sold separately)
- Worn or damaged tiles can be easily replaced
- Vinyl nosing available for border (sold separately)


18" x 18" x 1/4" (12 tiles/case)
SURFACE
Material: Solution-dyed PET (polyethylene terephthalate), 3% latex
Weight: 30 ounces/yard2
Construction: Needle-punched
Design: Diamond, Diagonal, or Geometric
BACKING
Material: SBR rubber - universal cleated
Thickness: 100-mil
Overall Tile Thickness: 100-mil tiles: 1/4 inch (0.2500")
STANDARDS & TESTING
- Passes DOC-FF1-70 for the surface flammability of carpets
- Certified high-traction by the National Floor Safety Institute (NFSI)
Waterhog Max Tiles can be cleaned using the following instructions:
- Vacuum regularly (daily in high-traffic commercial areas; weekly in lower-traffic areas)
- Extract or hose off as needed to remove heavy soil/debris
- Hang mat to dry
Always make sure the mat is dry before placing it back in service.
Determine the Number of Tiles You Will Need
- Measure the length and width of the area of carpet.
- Multiply the width by the length to get the square footage of the space.
- For areas that are not rectangular, break the area into smaller rectangles. Multiply the width by the length for each small rectangle, then add up all results to calculate the overall square footage.
Prepare for Installation
- Remove any old floor coverings, debris, and adhesive from the floor.
- Clean the entire floor surface of any dust, drywall mud, etc.
- Once the floor has been cleaned, allow it to dry completely.
- Allow the tiles to sit in the area uninstalled for several hours so they can acclimate to room temperature prior to installation.
Layout Your Grid
- Determine the center of the area by snapping chalk lines between the midpoints of the areas opposing sides.
- Measure from the center point (the point at which two chalk lines converge) up to three feet and make a mark.
- Now measure from the center point to the left four feet and make another mark. If the distance between these two marks is five feet, then your reference lines are perfectly square.
Install the Tiles
- Apply your adhesive to the prepared flooring according to the adhesive manufacturer's directions. We recommend CA024 solvent-free adhesive for both indoor and outdoor installations. Never us an adhesive that contains solvents.
- Starting with one quadrant, install a row of full tiles along both reference lines.
- First, apply the adhesive using a paint roller.
- Next, place the tiles along the reference lines, applying firm pressure with the palm of your hand to ensure good contact with the adhesive. Tiles should be placed snug against the adjacent tiles, and their edges accurately aligned with one another.
- Continue by placing tiles row by row, using the stair step method, always starting at the center and moving toward the side.
Trim/Fit the Perimeter Tiles
After you have placed all the full tiles, the perimeter tiles must be accurately marked and cut to fit snug against the side.
- Start by placing the tile to be cut directly on top of the last tile in a row.
- Next, position another tile against the wall and on top of the tile to be cut.
- Make a mark on each side where the outer corners of the top tile overlap the tile to be cut.
- Remove the tiles, and using a sharp utility knife and a straight edge, cut through the back of the perimeter tile between the two marks.
- Use this same procedure to cut and fit the rest of the perimeter tiles.